MailFeed needs a Google Cloud project with OAuth credentials (to read your Gmail). A Gemini API key is optional — it enables AI-powered features like semantic search. This guide walks you through each step.
1Create a Google Cloud ProjectStep 1 of 6
- Go to the Create Project page in Google Cloud Console.
- Enter a project name (e.g.,
MailFeed). - Click Create and wait for it to provision.
- Make sure the new project is selected in the top navigation bar.
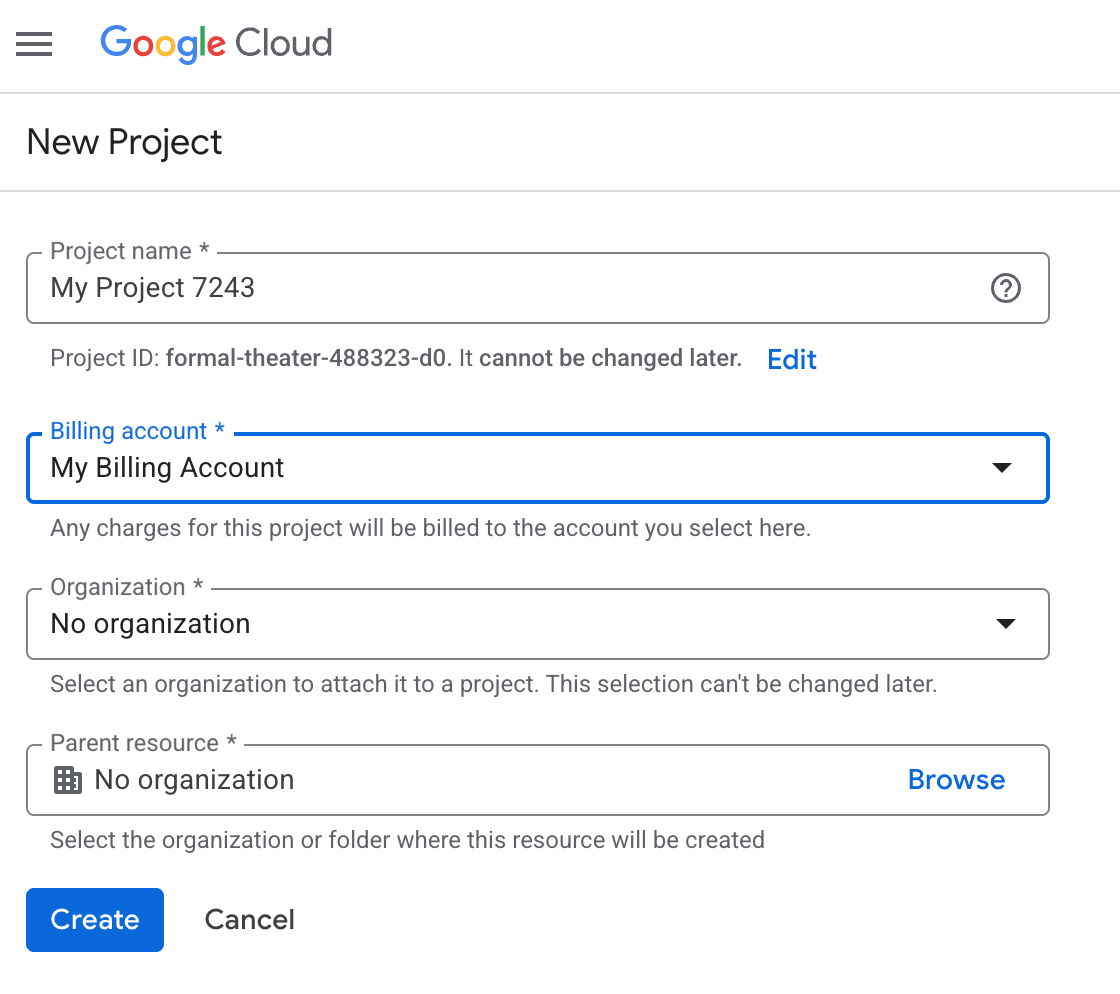
Google Cloud Console — Create Project page with project name field
2Enable the Gmail APIStep 2 of 6
- Open the Gmail API page in the API Library.
- Click Enable.
- Wait for the API to be enabled — you'll see a confirmation with usage metrics.
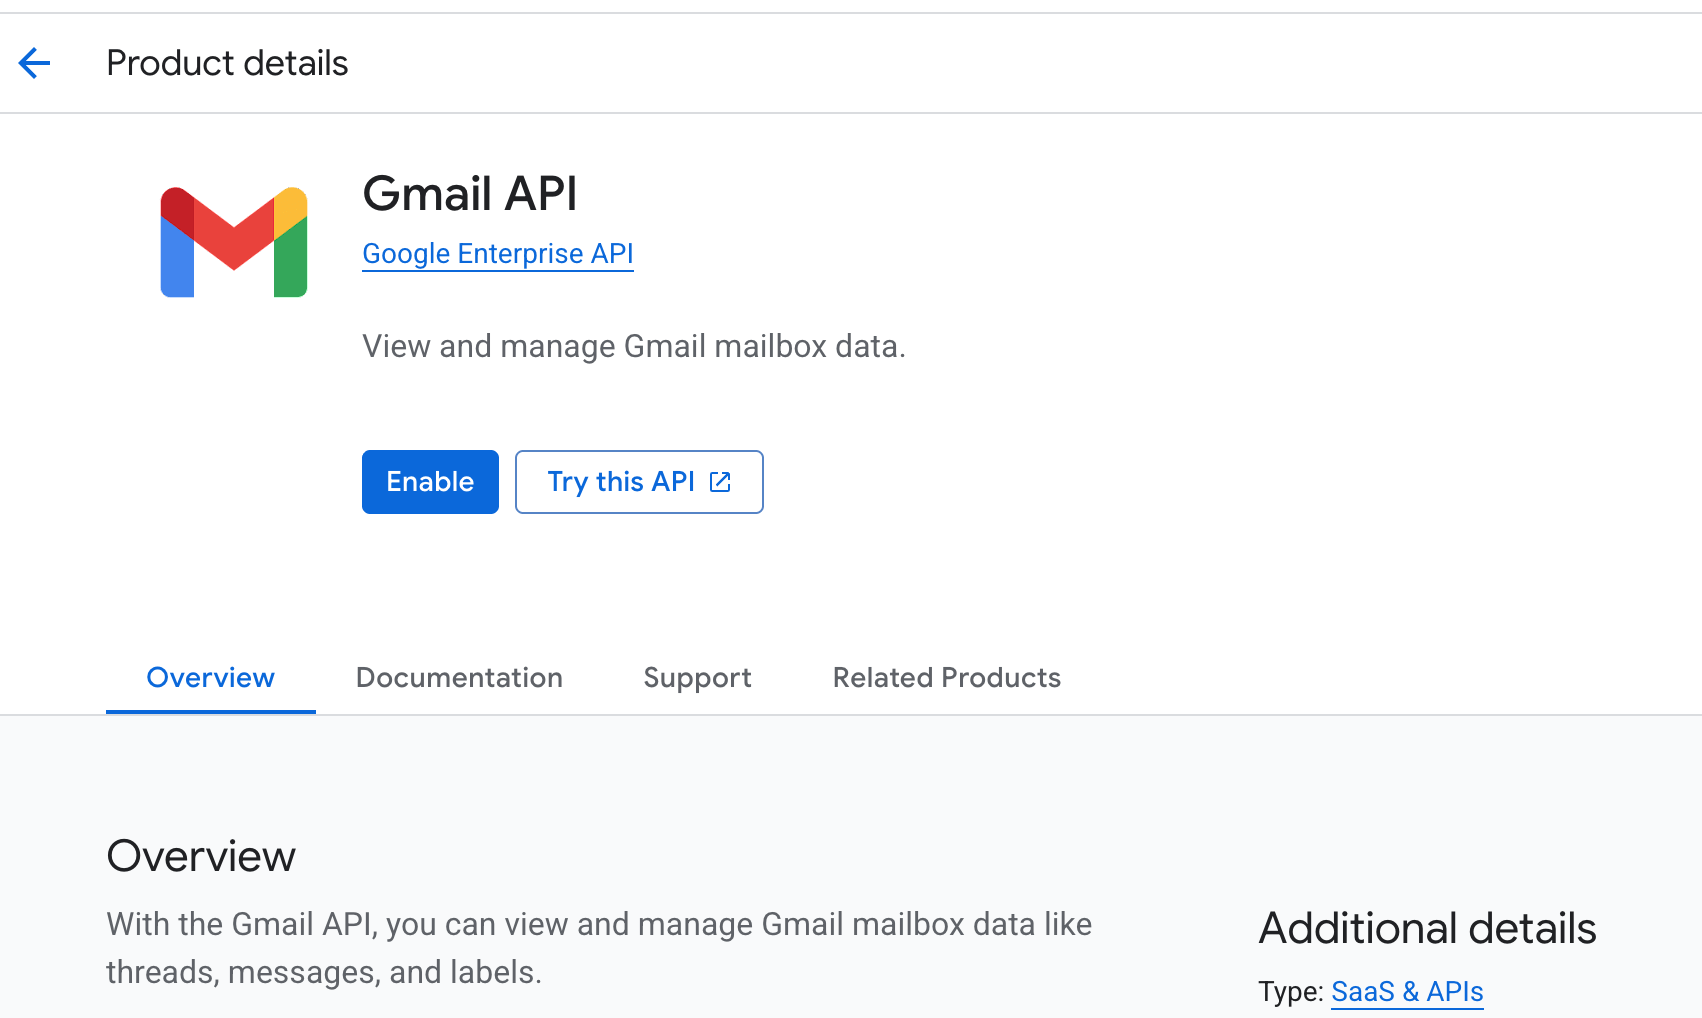
Gmail API page in API Library with the Enable button highlighted
3Configure the OAuth Consent ScreenStep 3 of 6
- Go to OAuth consent screen.
- Select External as the user type and click Create.
- Fill in the required fields:
- App name:
MailFeed - User support email: your email address
- Developer contact: your email address
- App name:
- On the Scopes step, click Add or Remove Scopes and add:
https://www.googleapis.com/auth/gmail.readonly
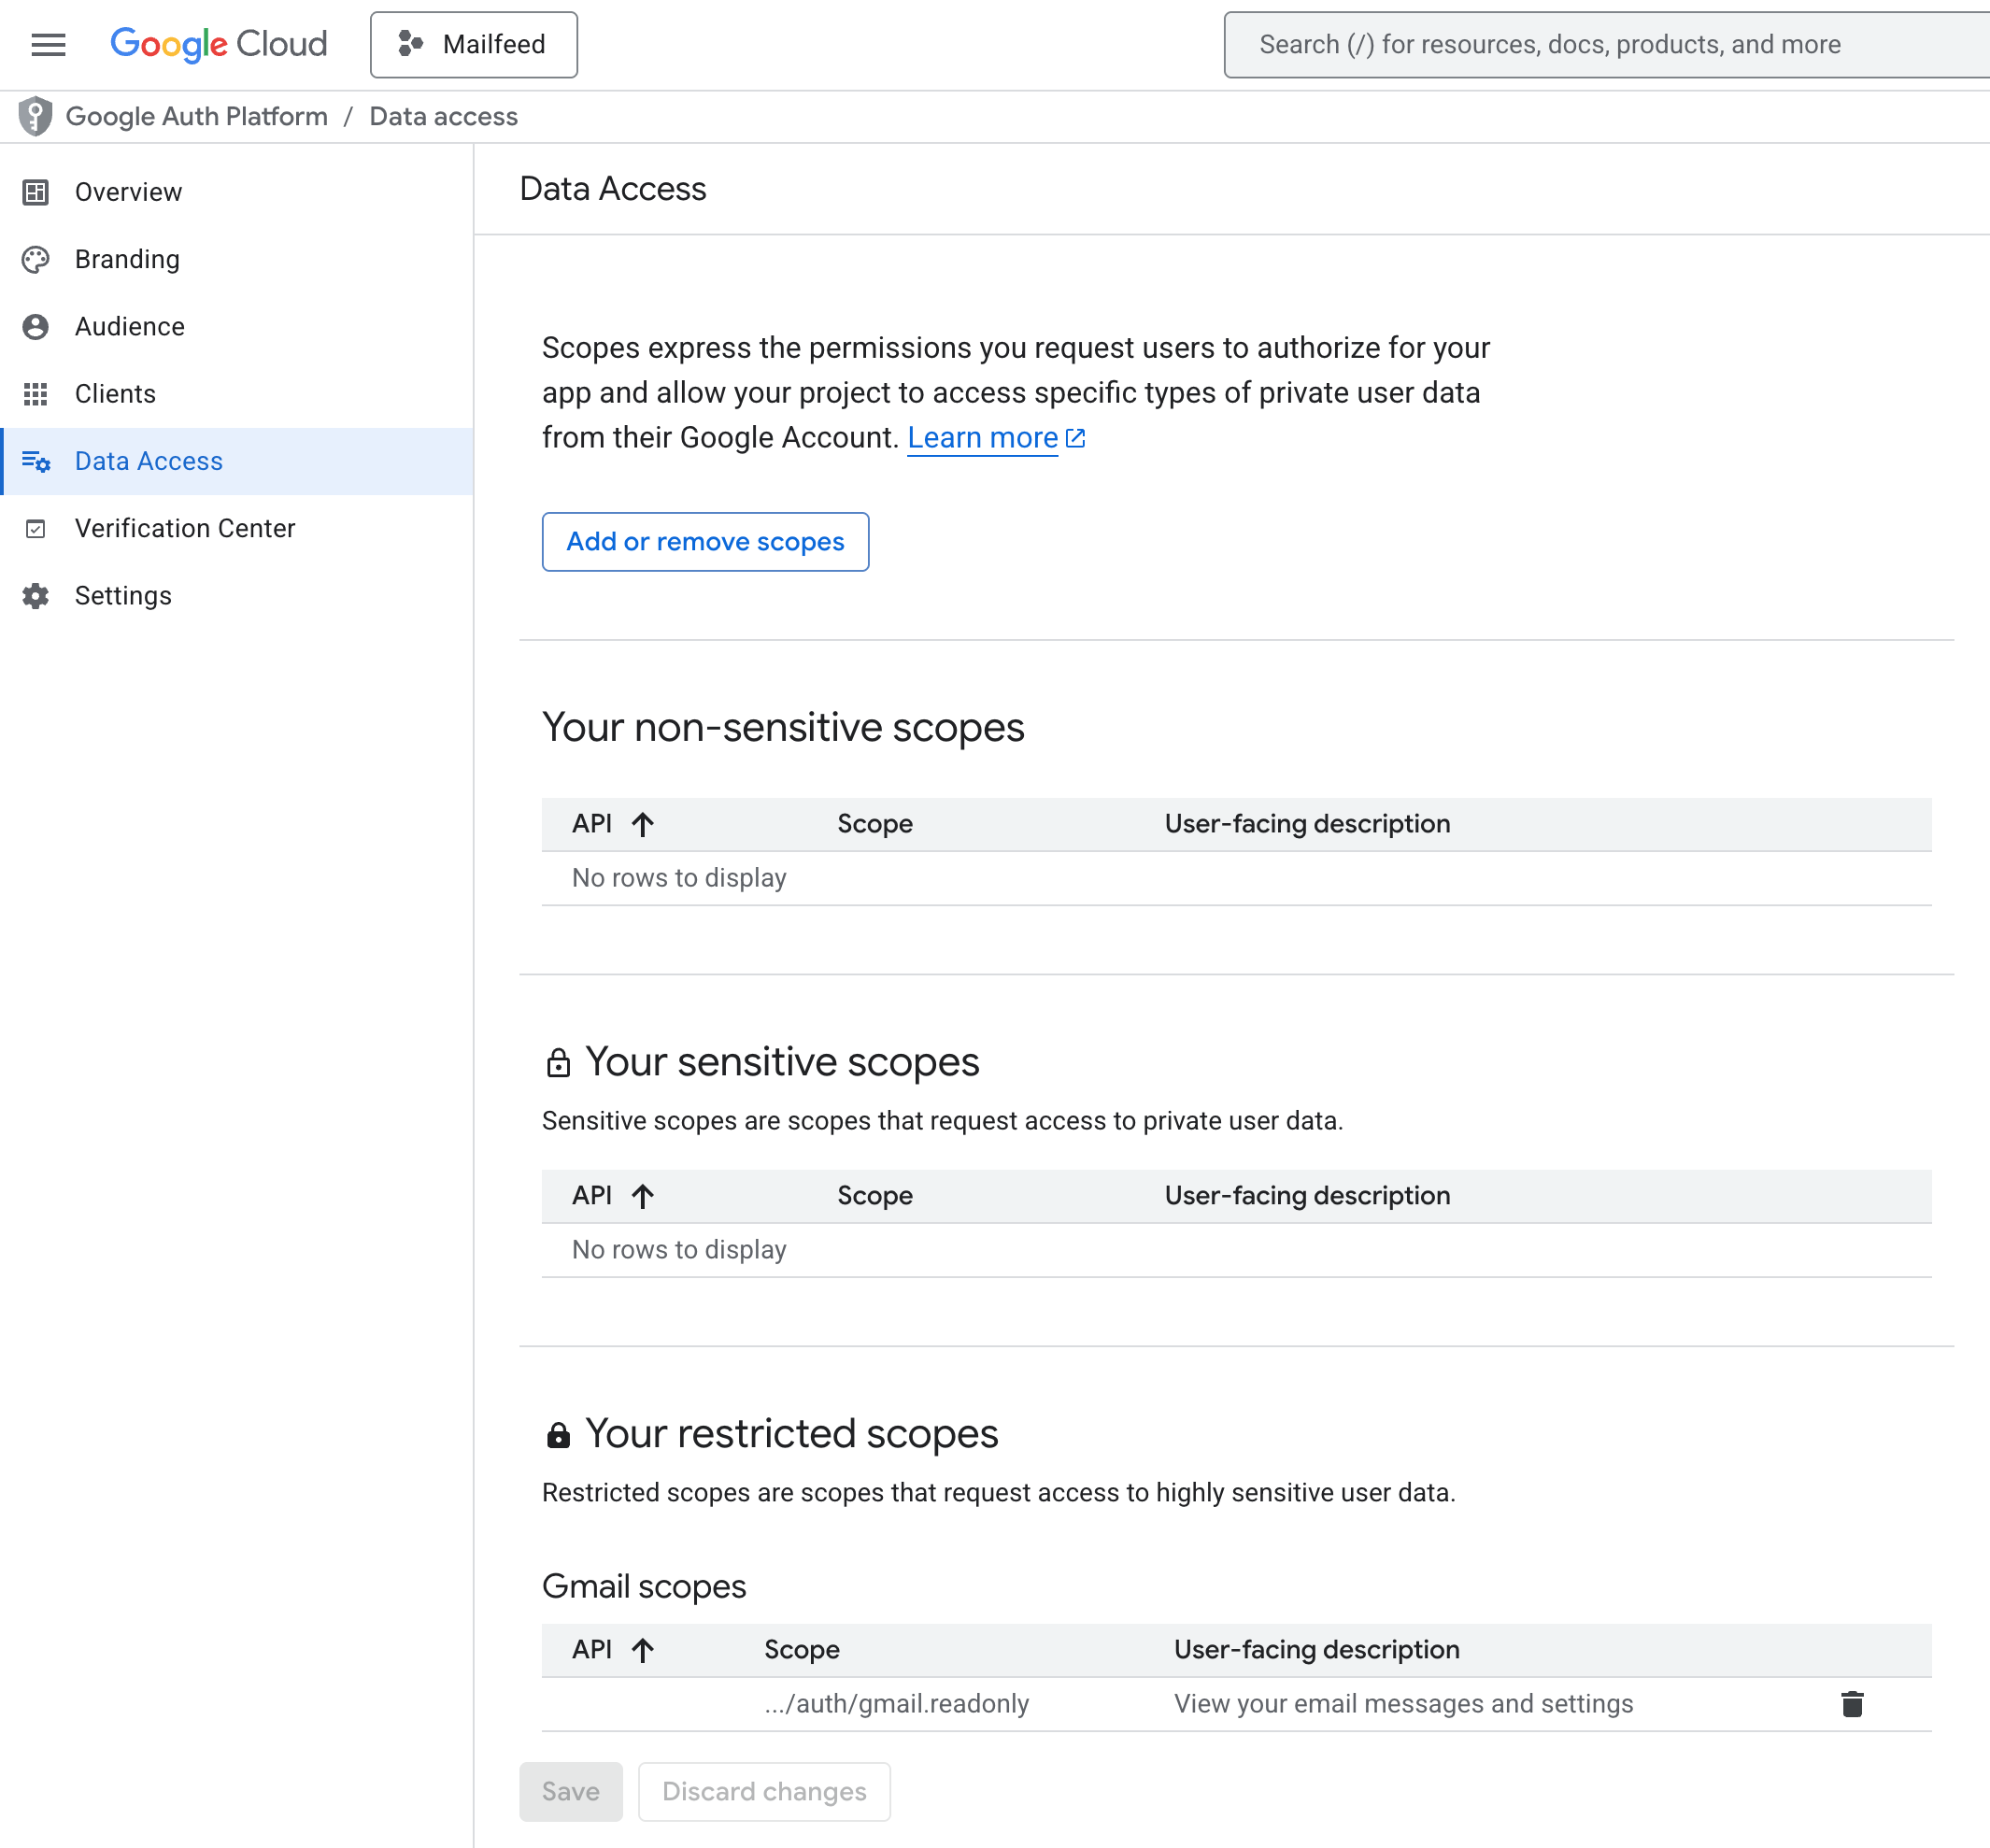
Add or Remove Scopes dialog with gmail.readonly scope selected
- Now configure the audience of users who can access your app. On the Test users step, add the Gmail address you'll use to log in.
- Click Save and Continue through the remaining steps.
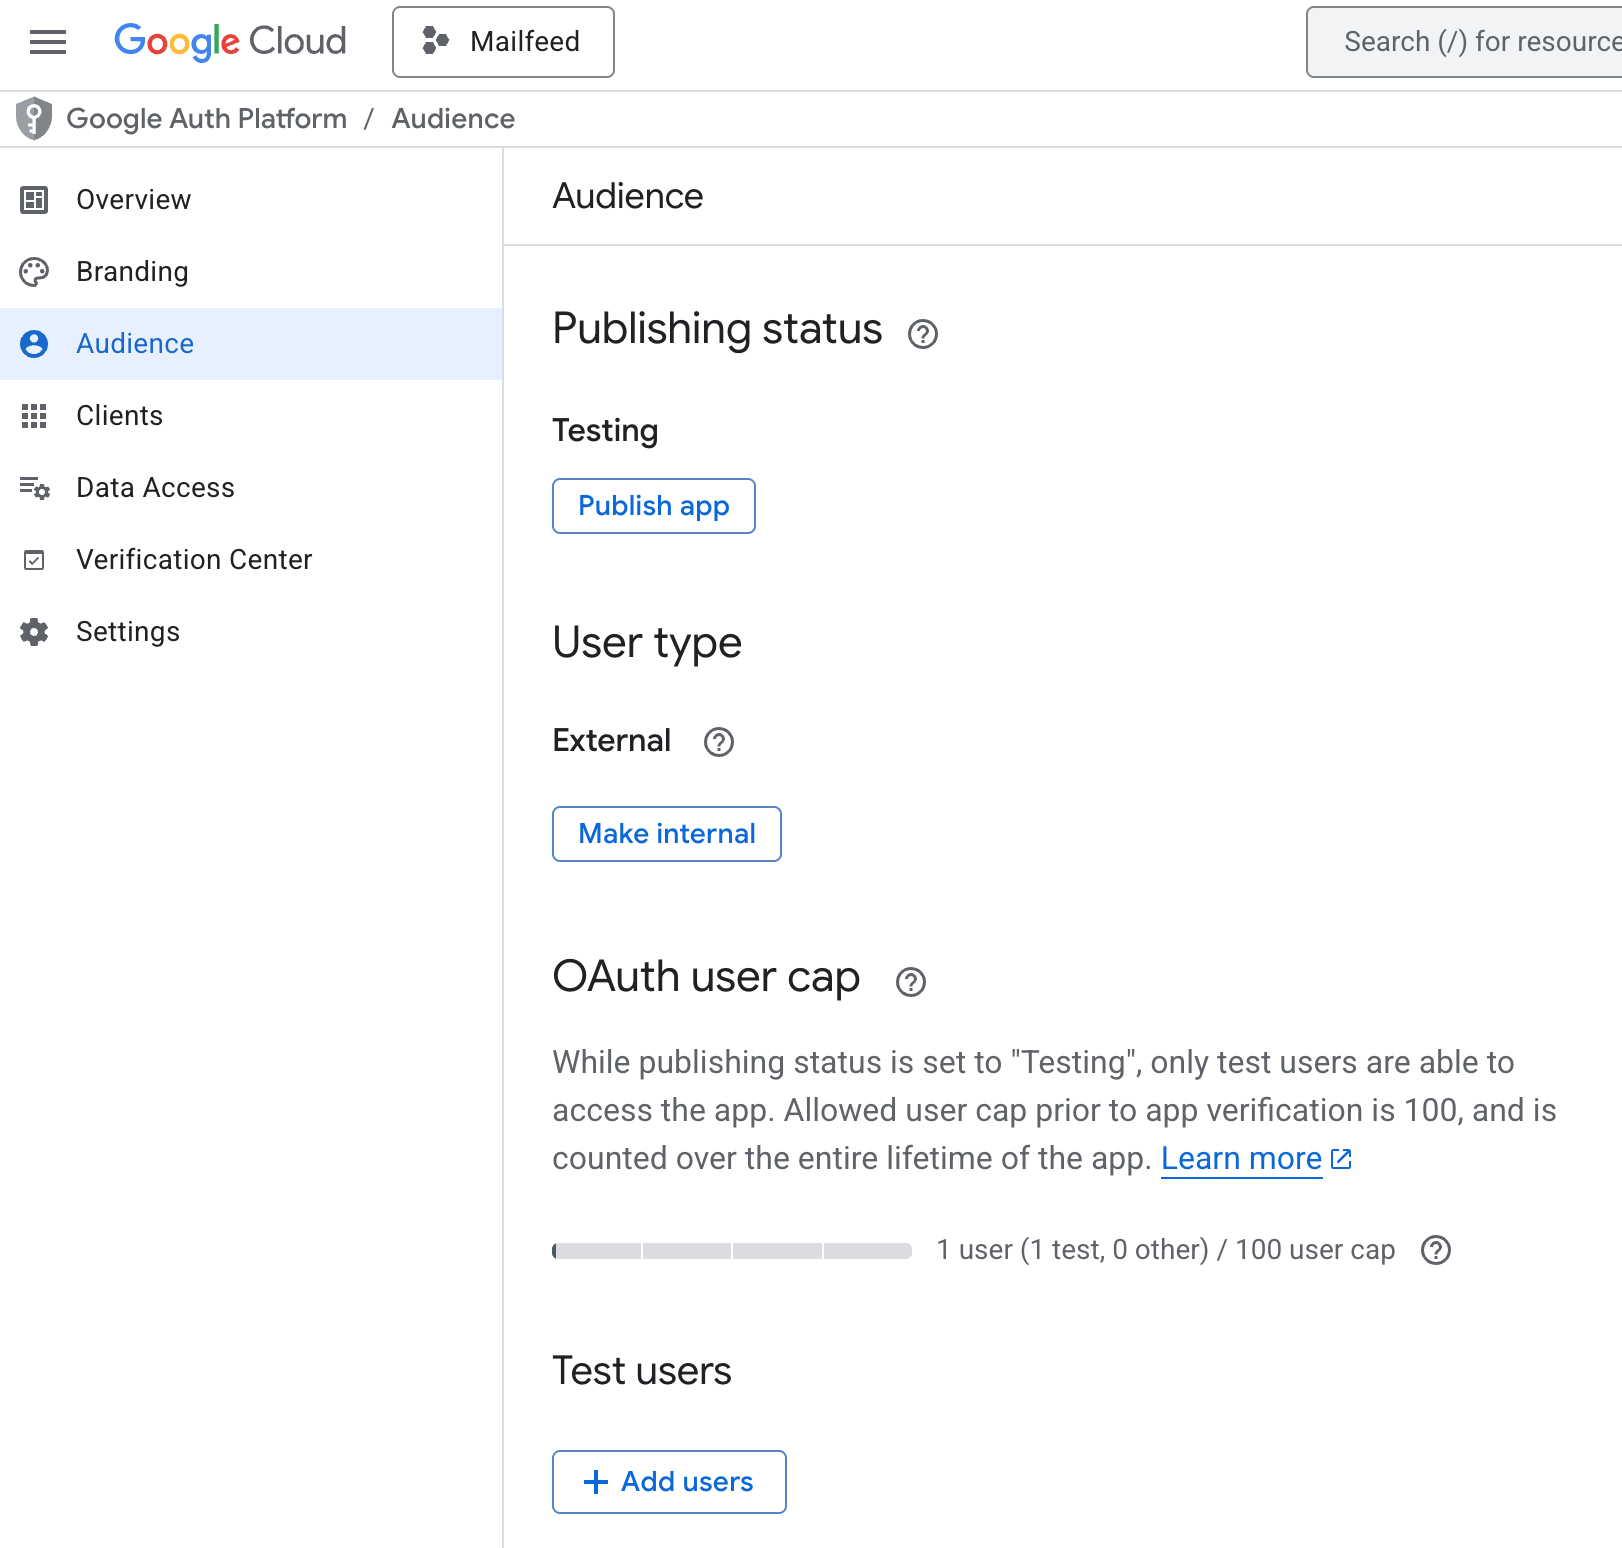
OAuth consent screen configuration with app name, scopes, and test users
4Create OAuth 2.0 CredentialsStep 4 of 6
- Go to Credentials and click Create Credentials → OAuth client ID.
- Set Application type to
Web application. - Name it anything (e.g.,
MailFeed Local). - Under Authorized redirect URIs, click Add URI and enter:
http://localhost:3000/api/auth/callback/google - Click Create.
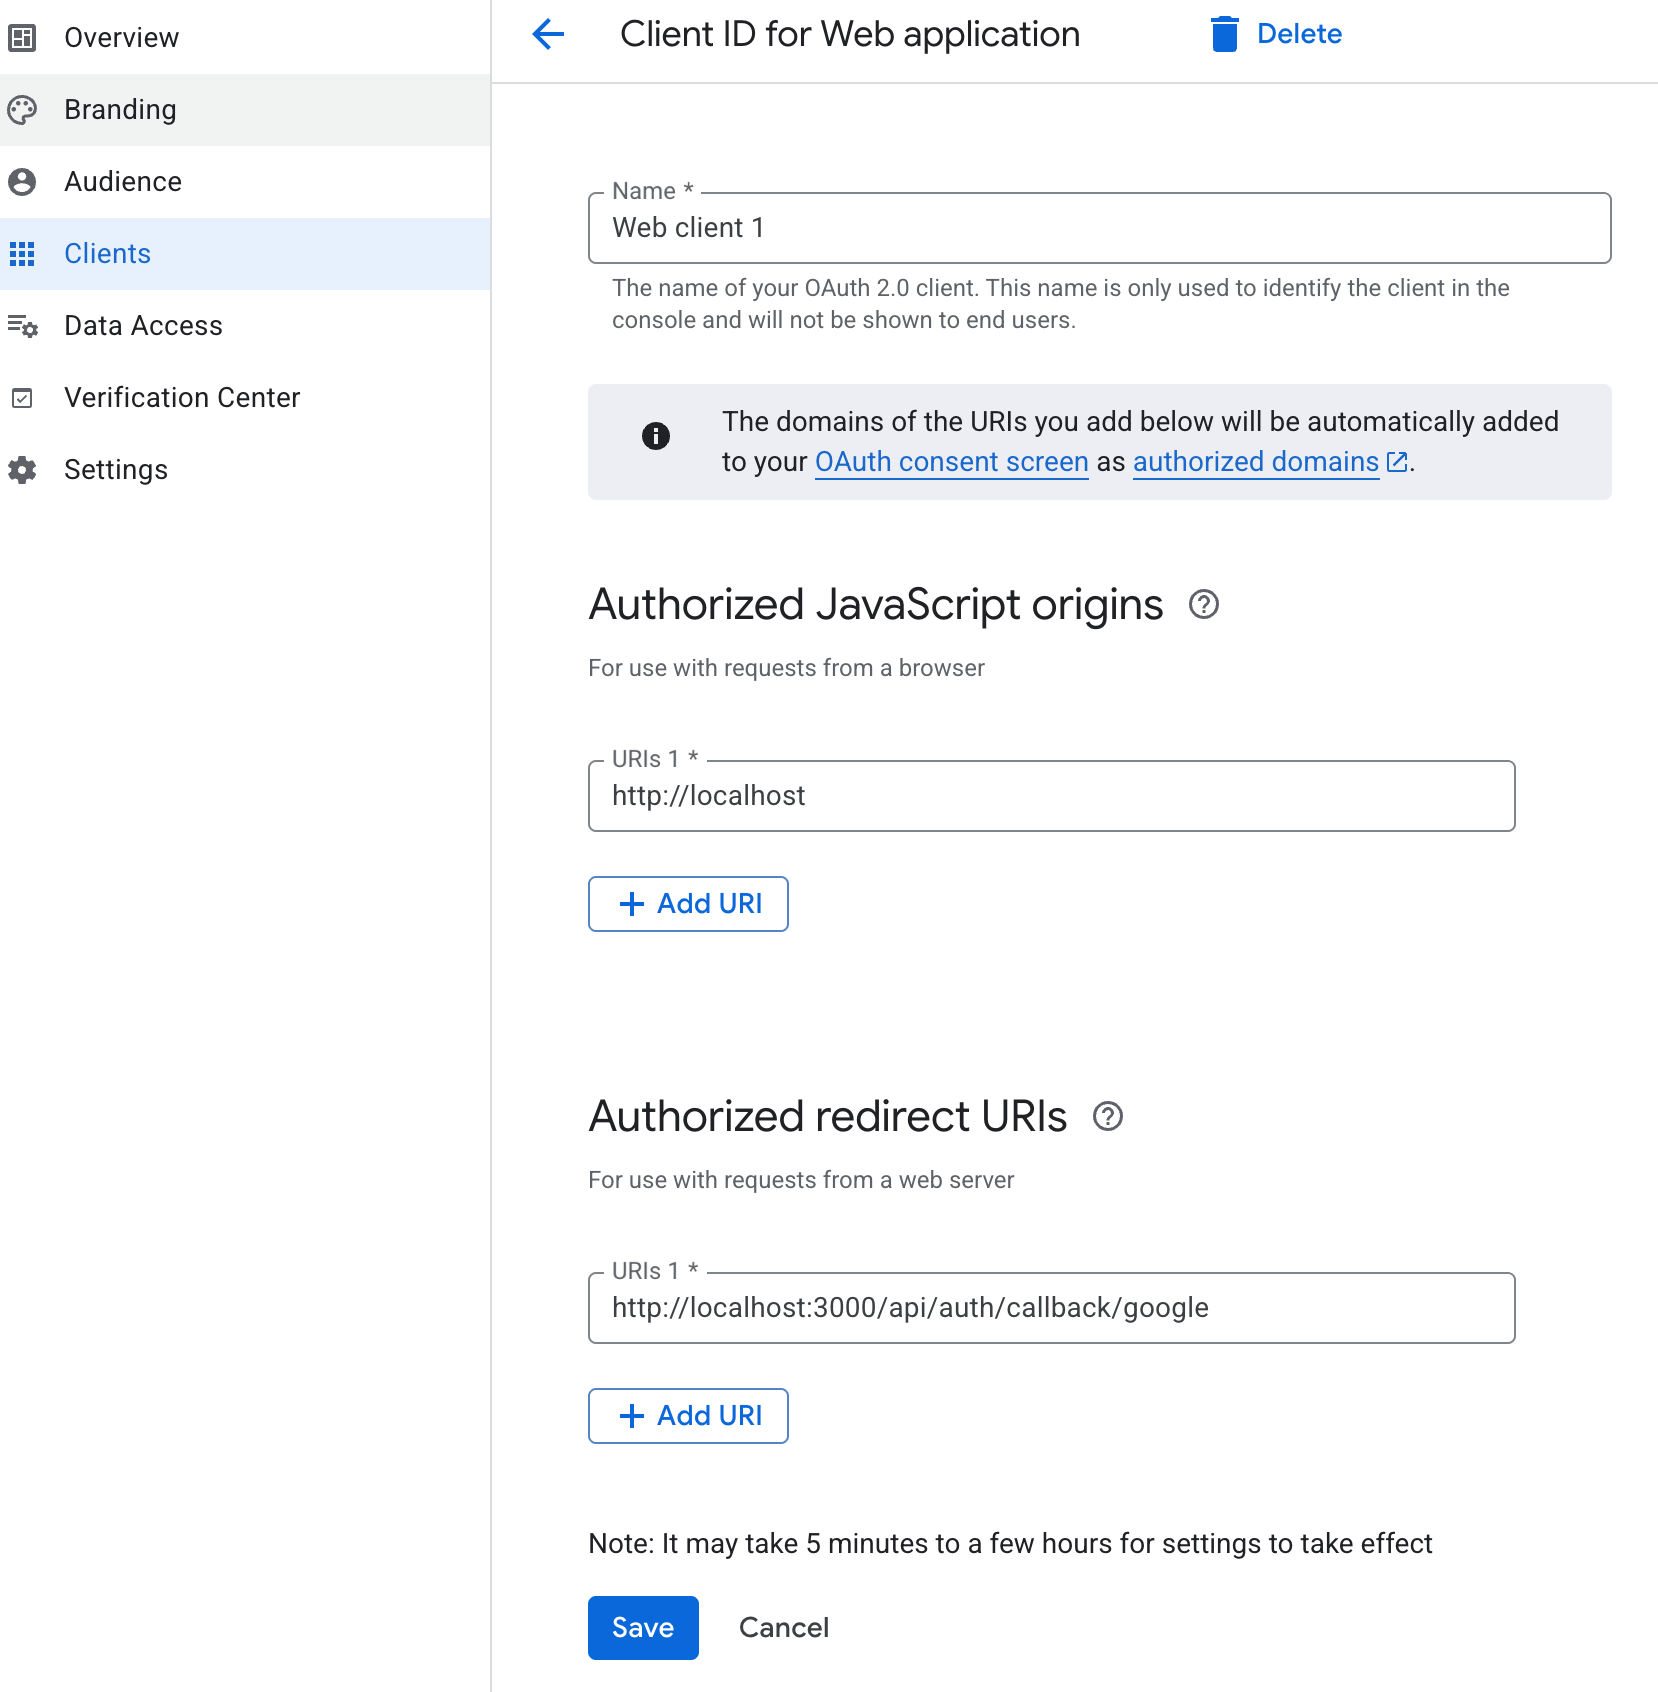
Create OAuth client ID form with Web application type and redirect URI
5Copy Client ID and Client SecretStep 5 of 6
- After creating the credentials, a dialog shows your Client ID and Client Secret.
- Copy both values into your
.envfile:GOOGLE_CLIENT_ID="your-client-id.apps.googleusercontent.com" GOOGLE_CLIENT_SECRET="GOCSPX-your-client-secret" - You can also find these later under Credentials by clicking the credential name.
6Get an AI Platform API KeyOptionalStep 6 of 6
This key powers AI semantic search. MailFeed works without it — you can add it later. The simplest way to get one is through Google AI Studio with a Gemini API key.
- Go to Google AI Studio.
- Click Create API Key and select your Google Cloud project.
- Copy the key into your
.envfile:GEMINI_API_KEY="your-gemini-api-key"
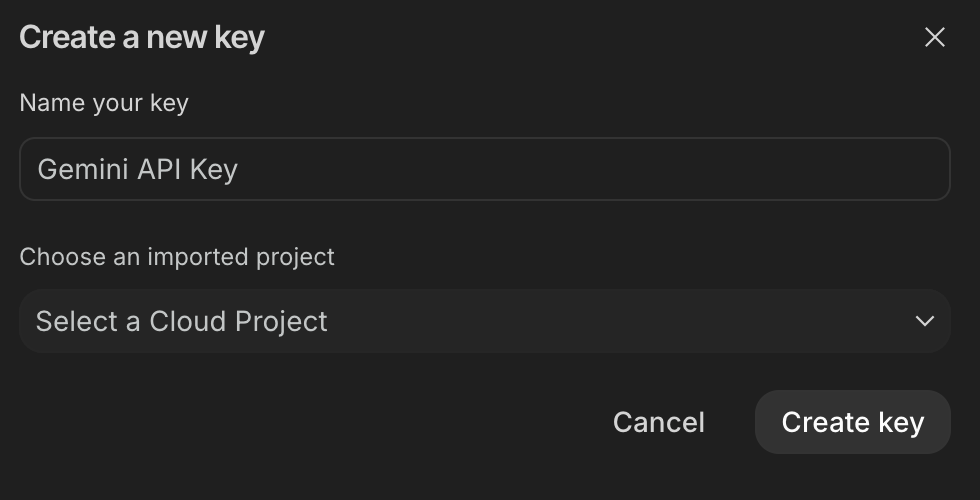
Google AI Studio API key creation page
You're all set
With your OAuth credentials in the .env file (and optionally a Gemini key for AI features), start the app with docker compose up and sign in.